
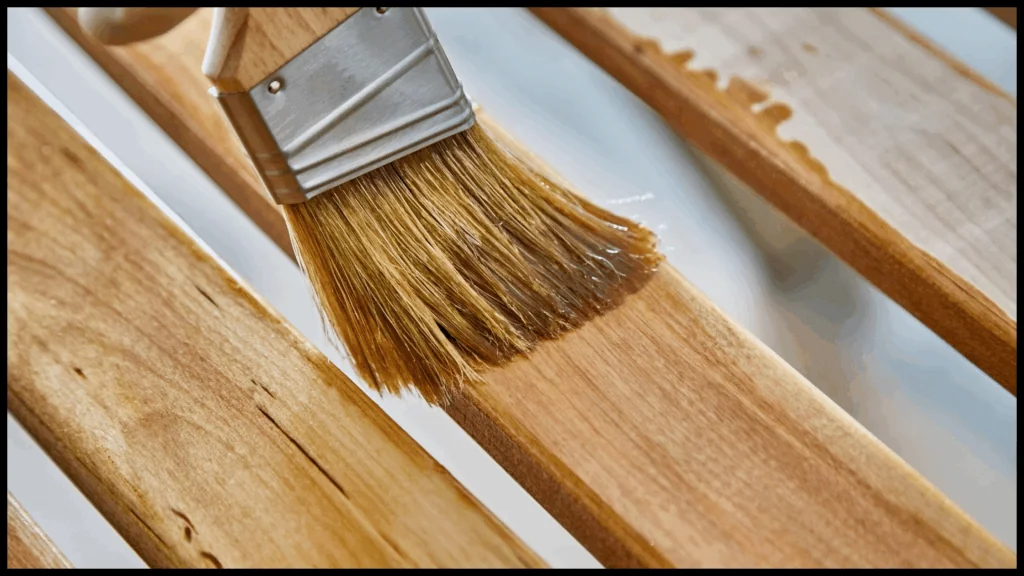
Pressure-treated wood is a common choice for outdoor projects due to its excellent durability and resistance to decay. However, to better safeguard it and improve its appearance, It is strongly advised to paint pressure-treated wood. In this thorough guide, we will walk you through the process of painting pressure-treated wood, from preparation to finish and maintenance.
Is it possible to paint Pressure-Treated Wood?
Yes, you can paint pressure-treated wood. However, it’s important to note that pressure-treated wood contains chemicals that can make it challenging for paint to adhere properly.
Understanding Pressure-Treated Wood
Prior to beginning the painting process, it’s essential to have a deep understanding of pressure-treated wood. Essentially, pressure-treated wood is lumber that has been impregnated with preservatives to extend its lifespan and protect it from insect damage and decay. There are various types of pressure-treated wood available, including southern yellow pine, cedar, and redwood, each with its unique characteristics and applications.
The Benefits of Using Pressure-Treated Wood
Pressure-treated wood offers many advantages over untreated lumber wood. It is highly resistant to rot, decay, and insect infestations, making it ideal for outdoor structures and projects that come into contact with moisture. Additionally, pressure-treated wood is incredibly durable and can withstand constant exposure to the elements, including rain, sun, and snow. This longevity makes it a cost-effective choice in the long run, as it reduces the need for frequent replacements.
Preparation
Preparing the wood surface properly is crucial to ensure a successful paint job. Follow these steps to get your pressure-treated wood ready for painting:
- Cleaning: Begin by removing any dirt, debris, or mildew that may have accumulated on the wood’s surface. Use a mixture of mild detergent and water, along with a stiff brush, to scrub away any impurities. Rinse thoroughly and allow the wood to dry completely before moving on to the next step.
- Sanding: Sanding the surface helps to create a smooth and even texture, allowing the paint to adhere better. Start with a coarse-grit sandpaper to remove any rough spots or splinters and then switch to a finer-grit sandpaper to achieve a polished finish. Remember to sand in the direction of the wood’s grain for the best results.
- Filling Cracks and Holes: Inspect the wood for any cracks or holes and fill them using an exterior-grade wood filler. Apply the filler according to the manufacturer’s instructions, and once dry, sand it down to ensure a seamless surface.
Priming
Priming is a crucial step in the painting process, as it enhances adhesion and provides a protective barrier for the wood. Follow these guidelines when priming pressure-treated wood:
- Importance of Priming: Priming helps to prevent moisture penetration, which can lead to warping and premature paint failure. It also ensures that the paint color appears more vibrant and consistent.
- Choosing the Right Primer: Opt for an exterior-grade primer specifically designed for pressure-treated wood. Look for a primer that is water-resistant and provides excellent adhesion.
- Applying Primer to Pressure-Treated Wood: Use a high-quality brush or roller to apply an even coat of primer to the wood surface. Follow the manufacturer’s instructions for drying times and recoating, if necessary.
Painting
Once the primer is dry, it’s time to apply paint to your pressure-treated wood. Here are a few tips to achieve the best results:
- Selecting the Right Paint: Choose an exterior-grade paint that is formulated to withstand outdoor conditions. Consider using a paint with UV protection to prevent fading over time.
- Applying Paint to Pressure-Treated Wood: You have several options for applying paint – brushes, rollers, or sprayers. Brushes work well for smaller areas and detailed work, while rollers are excellent for larger surfaces. Sprayers provide a more even application but may require more practice to achieve optimal results.
- Multiple Coats and Drying Times: Apply multiple thin coats of paint rather than one thick coat for better durability and coverage. Allow each coat to dry completely before applying the next one, following the paint manufacturer’s recommended drying times.
Maintenance
To ensure your painted pressure-treated wood remains in excellent condition, regular maintenance is key. Here are a few essential maintenance tips to follow:
- Regular Inspections: Periodically inspect your painted pressure-treated wood for any signs of chipping, cracking, or peeling paint. Address any issues promptly to prevent further damage.
- Cleaning and Reapplication of Paint: Clean the wood surface with mild detergent and water to remove dirt and grime. If necessary, lightly sand the surface before applying a new coat of paint. Regularly reapply paint every few years or as needed to maintain its protective barrier and appearance.
- Preventing Rot and Decay: Ensure proper drainage around your pressure-treated wood to prevent water pooling and the potential for rot and decay. Regularly inspect for any signs of water damage and address any issues promptly.
Recommended paints for Pressure-Treated Wood
When it comes to painting pressure-treated wood, choosing the right paint is crucial for achieving a durable and long-lasting finish. Here are some of the best types of paint to use:
- Acrylic Latex Paint: This type of paint is highly recommended for pressure-treated wood due to its durability and flexibility. Acrylic latex paint is water-based, which allows it to expand and contract with the wood, preventing cracking and peeling.
- Exterior Oil-Based Paint: Oil-based paints are known for their durability and weather resistance. They penetrate deeply into the wood, providing a strong bond and long-lasting protection against the elements.
- Solid Color Stain: Solid color stains are another excellent option for pressure-treated wood. They provide a rich color while still allowing the wood grain to show through. Solid color stains also offer excellent UV protection and are less likely to peel than traditional paint.
- Alkyd Paint: Alkyd paints are oil-based paints that provide a durable and glossy finish. They are ideal for high-traffic areas and can withstand harsh weather conditions.
- Epoxy Paint: Epoxy paints are extremely durable and are often used on surfaces that require a tough, chemical-resistant finish. While they can be more expensive than other types of paint, epoxy paints provide excellent protection for pressure-treated wood.
FAQs
- How long does pressure-treated wood need to dry before painting?
Before applying paint, pressure-treated wood should dry for at least six weeks to allow the moisture content to stabilize. This timeframe may vary depending on environmental conditions such as humidity and temperature. - Can you stain pressure-treated wood instead of painting?
Yes, staining is an alternative option to painting pressure-treated wood. Stains provide a more natural and transparent finish, highlighting the wood grain while still offering protection. Ensure you choose a wood stain specifically designed for pressure-treated wood and follow the manufacturer’s instructions for application.
Conclusion, painting a pressure-treated wood is a worthwhile investment to enhance its durability and appearance. By following this simple guide, you can ensure a successful painting that will protect your wood for years.
Remember to always prioritize safety and follow the manufacturer’s instructions regarding the use of tools, materials, and paint products. Happy painting!
Hire Your Local Professional Painter at ElitePro Painting
Elite Pro Painting
383 Williams Court,
Avon, IN 46123(317) 388-1848


