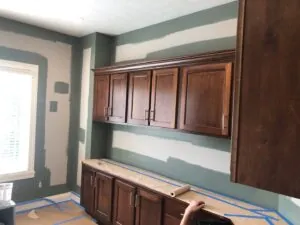
Most homeowners think that painting a house is 90% brushing and 10% cleaning. In reality, if you want a paint job that actually lasts through Indiana winters and humid summers, it’s the other way around. Prep is everything. If you skip the prep, you aren’t just painting; you’re just delaying a much more expensive repair bill later.
Here is how we prepare a home to ensure the coating doesn’t just look good, but stays bonded for years to come.
1. Identifying the “Red Flags”
When I first walk up to a house, I’m looking for more than just dirty siding. I’m looking for signs of structural vulnerability. A novice might just see “old paint,” but I’m looking for:
- Failed Caulk Lines: Cracks or holes in the sealant where moisture can sneak in.
- Woodpecker Damage: Holes that act as open invitations for rot and pests.
- Loose Boards: Siding that is pulling away or warping.
- Flagging Paint: This is where the edges of the paint are physically raised up, signaling that the bond has already failed.
THE "SNOW LINE" CHECK
2. Cleaning and Drying

Power washing is the first step, but the “when” is just as important as the “how.” In Central Indiana, we are lucky to have the wind on our side. While some guides tell you to wait a week, we’ve found that the wind and sun usually dry surfaces quickly enough to paint the very next day. We schedule our power washing for the same week as the painting to ensure we’re working on a fresh, clean surface.
3. The Truth About Scraping and Caulking
There is a lot of debate about removing old caulk. My take? You don’t need to completely remove it unless it’s practically falling out on its own. We typically scrape and skim. If the original bead is still bonded, caulking over the top provides a better, more durable seal than trying to dig everything out and starting from scratch.
When it comes to scraping, we focus on “Flagging” paint. If the edge is raised, it has to go. But you can’t scrape forever—you have to know when to stop.
4. My “Super Power” Product: Peel Bond
If you want a smooth finish without spending weeks sanding your house down to bare wood, you need a high-build bonding primer. We use a product called Peel Bond. Think of it like a band-aid. It flows into the gaps and holds down the previous surface, keeping failing paint from continuing to peel. It levels the surface and locks everything in place so your topcoat has a solid foundation.
5. Structural Repairs: Bondo and Fasteners

For those woodpecker holes or rotted spots, we use a two-part epoxy or wood filler. In my experience, Bondo is the best tool for the job. It cures harder than the wood itself and won’t shrink or crack over time. Once it’s sanded and primed, the repair is invisible.For loose boards, we evaluate them case-by-case. Sometimes a few nails will do, but if a board is warping, we’ll use specialized exterior screws or replace the board entirely to ensure it stays flush.
THE CEDAR EXCEPTION
6. Why Real Prep Matters
Because of this intensive prep work, our paint jobs typically last several years longer than a standard “splash-and-dash” job. In fact, we often find that we return to houses because the homeowner wants a color change or because the sun has faded the pigment—not because the paint is failing.
Note on Color
7. The Order of Operations
If you take nothing else from this, take the sequence. Every step above exists because of what the step before it leaves behind.
- Walk the house and mark the failures — split caulk lines, woodpecker holes, loose boards, flagging edges.
- Wash, then let it dry. In Central Indiana that is usually a danot a week.
- Scrape the flagging paint back to an edge that holds. Then stop.
- Skim and re-caulk the joints that need it, over the bead that still bonded.
- Make the structural repairs — fill the holes, screw down or re the boards.
- Prime. Peel Bond over the patchwork, oil-based primer over anyexposed cedar.
- Only then, paint.
One detail worth calling out: the wash comes before the scrape, not after. Dirt and chalk hide the very edges you are hunting for, and a chalky surface makes perfectly sound paint feel loose under the blade. Wash first and the failures show themselves.
Run them out of order and you undo your own work. Caulk before you scrape and you will scrape the caulk back off. Prime before you repair and you will have primed a hole.
HOW LONG PREP ACTUALLY TAKES
8. Conclusion: You Are Paying for the Prep
When you line up three quotes for the same house, the paint itself is rarely what separates them. All three will name a reasonable product. The real gap is how many of those seven steps each crew actually intends to carry out — and none of that appears in a bid unless you ask for it in writing.
So ask. Ask what gets scraped and what gets left. Ask which primer is going on the cedar. Ask whether the rotted trim is filled or replaced, and who makes that call standing in front of it. A crew that has actually looked at your house will have an answer for every one of those. A crew that has not will tell you the paint is very good.
If you are taking this on yourself, the honest boundary is the primer. Washing, scraping and caulking are all within reach of a careful homeowner with a ladder and a free weekend. Knowing when a board needs replacing rather than filling, and which primer a surface demands, is where the experience earns its keep — and where one wrong call costs you the entire coat.
Prep is invisible on the day the job finishes. Every house looks sharp with fresh paint on it. It turns visible in year four, when one house still looks painted and the one next door is flagging along the snow line. That difference was settled before anyone opened a can.
Prep is not the part of the job you pay for reluctantly. It is the part you are actually buying.
Get a Free Estimate